Do magnets stick to chalkboards?
Most magnets won’t stick to standard chalkboards. However, if you want to make your own magnetic chalkboard, it’s an easy DIY task that you can do at home! We’ve outlined some of the steps below, as well as how to clean your chalkboard to keep it looking like new.
How to make a magnetic chalkboard
There are two ways you can create a magnetic chalkboard. Either way will work – it’s just down to personal preference. So, have a read of both of our methods and choose which one sounds best for you.
Using a magnetic primer
You should use a magnetic primer if you want to use large magnets on the chalkboard. If you want to use small magnets, the magnetic primer may not be strong enough to hold these. In which case, take a look at our second method.
You will need:
- 1 piece of hardboard or high-density fibreboard (this can be purchased from most DIY stores)
- 1 tin of magnetic primer
- 1 tin of chalkboard paint
- 2 pieces of wood to make up the frame (sized correctly according to the dimensions of your hardboard and cut at a 45 degree angle)
- 2 D-ring hangers and screws
- Nails
First, you need to prime the piece of hardboard using the magnetic primer. Stir the primer well before use and apply at least two coats, waiting for the first coat to dry before adding a second layer.
When both coats of primer have dried (after around 24 hours), you can then apply your chalkboard paint. Use the paint according to the manufacturer’s instructions to ensure you get the best finish. You may find that the paint goes on more easily with a roller. Wait for it to dry fully before drawing on the board.
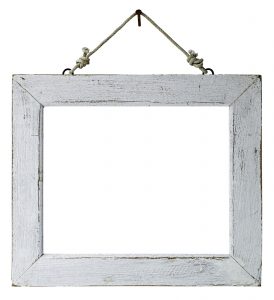
Once your board is dry, you can attach the frame around the edge using your two pieces of wood and some extra strong glue. Your frame pieces should be cut at a 45 degree angle so that they slot together like this:
When the glue has dried, attach your D-rings to hang the chalkboard using two nails. Then put two additional nails into the wall and hang your new magnetic chalkboard!
Using galvanised steel
Galvanised steel might be your preferred option if you want to use smaller magnets on the board as they will stick better.
You will need:
- 1 piece of hardboard
- 1 sheet of galvanised steel, cut to size
- Primer (specifically for galvanised surfaces)
- Glue adhesive
- Chalkboard paint
- Paintbrush
- Knife
- 2 pieces of wood to make up the frame (sized correctly according to the dimensions of your hardboard and cut at a 45 degree angle)
- 2 D-ring hangers and screws
- Nails
Using a knife, cut the hardboard and the galvanised steel to your desired dimensions, making sure they’re both the same size. Be careful when cutting the steel as it can become very sharp.
Stick the hardboard and the galvanised metal together using a strong adhesive. Lay the two pieces on a flat surface and weigh them down with something heavy. Allow to dry for at least a couple of hours.
Once the hardboard and the metal are stuck together, apply a primer to the steel. You should use a primer that is specifically for metal, as an ordinary primer may flake off. When the primer is dry, apply at least two coats of chalkboard paint. Wait for the first coat to dry fully before applying the second layer.
As with before, you can add your own frame using two pieces of wood that have both sides cut at a 45 degree angle. Then add your D hooks and hang!
For both methods, it’s recommended that you ‘season’ the chalkboard before you draw on it. You do this by taking a piece of chalk and, using the flat side, rub it all over the board. Once you’ve done this, use a cloth to remove any additional chalk dust. If you don’t season it, any chalk you apply to the board might stick permanently and make it more difficult to clean in the future.
How to clean a magnetic chalkboard
Chalkboards can get messy and covered in chalk dust that just won’t shift. So, how can you clean your magnetic chalkboard?
You should always use a chalkboard eraser to remove any chalk residue. Over time, many people find that their eraser isn’t as effective as it used to be. This is likely due to the eraser being dirty. You can keep this accessory clean by wiping it with a dry cloth or using a vacuum cleaner.
To thoroughly clean your board, use a dry microfibre cloth to get rid of most of the chalk residue. Add a couple of teaspoons of lemon oil to your cloth before wiping the board. Not only will this make the room smell amazing, lemon oil is great for removing tougher areas of chalk and will add a slight shine to the board. An added bonus is that it’s antibacterial.
Try to avoid using water to clean your chalkboard. Over time, this could ruin the quality of the chalkboard paint and it might make it more difficult to clean in the future. The water creates a layer of oily residue on the board. If you have this problem, it can be solved by re-seasoning the board. Take a piece of chalk and colour in the whole surface. Then erase what you’ve done with your chalkboard eraser. Repeat as needed.
You should always make sure that the board is completely dry before drawing on it again. Wet chalk can be absorbed by the chalkboard paint and will stay there permanently.

